Sunday, November 18, 2012

Family Room Makeover (Part 3)

Lots of progress this week, which makes me oh so happy!!

This is where we ended up.
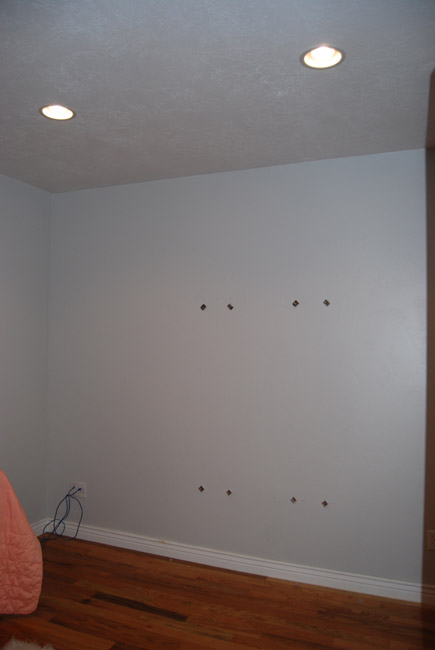
Sheetrock off, 2x4's exposed.  Those white pipes to the left are the hot and cold pipes from the bathroom directly upstairs.  We didn't open the wall any further so we wouldn't have to pay or mess with those white pipes.  If you see to the left of the white pipes a dark black pipe.  That was actually the pipe we thought we were going to find in the middle of the wall, so when we got the sheetrock off and there was no black pipe we were SOOOOO HAPPPPPPPY!  It all worked our perfect because our barn doors are each going to be 3 ft wide (= 6ft wide opening) and so we didn't need to move those white pipes. PHEW                     (move any pipes = $$$$)

This is the other wall where the fireplace is going to go.

We ripped off the sheetrock, and right away I got to taping what my mantel would look like on the wall.  To my hubbie's dismay, I am ALL Visual.  If I can't see it, I can't give it the final approval.  It's really hard to look at a blank wall and visualize 3-D objects that aren't really there. With me?  
So this is what I did.
 
Doesn't that help?
Here's another.

Can't you just visualize where the other window on the left is going to be? Good it was already framed in so I could visualize it ;)

Before the framer could come we had to move the gas line.  I hired out someone to do the actual cutting and moving of the pipe, but Cory and I decided to cut the subfloor and get it ready to reroute to save $$. 
This picture still freaks me out.
I think I was slightly freaked out because I could see the beams, insulation from the floor and the whole idea of compromising the sub-floor made me have to leave the room for a sec.  But like always it didn't stop us from DIourselves and we moved on!
The framer came and framed in the fireplace and installed the beam in about 5 hours.  He was fast and did a great job.  If you need a framer lmk and I'll give you his info.
And here is the room from the soon to be living room.
There is the framed in fireplace!
Can't wait for the window to be in, that's coming next week!

Have an amazing Thanksgiving and hug and kiss all those you care about.
That's my plan.
So look out to all my family that I love!
Loves,
Jill




Sunday, November 11, 2012

Family Room Makeover (Part 2)

This week we decided to open up the wall from family room to living room...if you remember this is what it looked like.
The blue line is where the wall will be open and eventual barn doors will reside.  We took the fireplace out last week and now we are ready to open up the wall.

This is the wall view from the other room, and from the hall looking in the living room.


It looked kinda freaky when Cory started sawing from the other room.  A saw moving all by itself was enough to keep Bensen entertained.

Yes at this moment I did start to think we are crazy and slightly over ambitious...
That slight weak moment didn't stop us of course.
And here is the wall, fully exposed, and open!

Now for this wall...

The blue line is where the fireplace and new mantel and surround will be.  
Remember this?
 The road is looking long until we get this beauty built. One step at a time, I keep reminding myself.

Next time we will be:
Installing a beam between the two rooms and cutting down the 2x4's the are supporting the ceiling.
Framing in the mantel and surround.
And wiring, wiring, wiring for the ceiling speakers, the tv, and moving all the outlets that need to be moved.
Stay Tuned!!

Loves,
Jill

Sunday, November 4, 2012

Family Room Makeover (Part1) Fireplace removal

In my last post found here it was all about my Halloween burlap banner that I made for my fireplace mantel.  Well things have slightly changed for that fireplace since then.  I have been planning this Family Room Makeover for about 5 years now, and the time has come to get movin!


I am so excited to have started this big' ol project.  It's messy, its big and it is going to take us awhile...but it is going to be sooooo worth it.  This is just a little glimpse into what I have in store for our family room....


This is where we started.
The line is the opening we are going to cut in the wall to create a bigger space from family to living room (also where the barn doors will be)
Corner fireplace is leaving (thank goodness, it wasn't ever supposed to be there anyway. Love builders)


 Demo begins.
btw I have the best husband. Takes my crazy, wakko ideas and gets just as excited about them as I do. I love him.


Asher getting in on the action.  It wasn't as hard as I thought it was going to be to get the stone off.  It actually all came off together in a big piece that we cut up into smaller pieces.


Exposed Fireplace.


Bensen wanted to get in on the fun too.


And if he wasn't helping demo he was patiently waiting to help anyway he could.


After all the framing was taken down, the fireplace was ready to be taken out.  Cory had already turned off the gas, unscrewed the gas line from the unit, and pulled out the vents from the wall that led to the outside.  It was all pretty easy, and something we were fine doing ourselves.


With the fireplace out and moved to the garage, it was time to start on the wall.


And here it is all cleaned up and ready to live in, since its back to life for the next couple of days. Demo gets put on hold for real life.
Next Saturday we'll get to do more!  That's the life of DIY'ers.

Good thing I started an "Avoid the Holiday 5 (or 10)" Bootcamp that wakes me up early and gets me to bed early.  Otherwise my excitedness to finish this project just might keep me up at night.  I am loving this bootcamp session so far. 8 fabulous ladies all in my basement at 6:00am MWF morning.  I feel so lucky to be able to do what I do.  These 8 ladies are inspiring me more right now then I'm helping them I'm sure of it.

Loves,
Jill


Friday, October 5, 2012

Burlap Halloween Banner

I got the Crafting Bug this week, and decided to make a Halloween Banner for my mantel.


The only thing I bought for this project was a vintage cardstock pack at Hobby Lobby.
I had everything else at home.

I wanted my Banner to say "HALLOWEEN", but I think a banner that says "SPOOKY" would of been super cute too.

Step One:
Pick out the cardstock you want to use, and cut out the flags.
*Tip I penciled in my banners all at the same time and cut them all at the same time...my opinion is that it makes more sense to do it that way...but I've learned my opinion is sometimes a little bit ummm...my opinion :)
My flags were 8 inches on the sides and 6.5 inches across the top.


2. Lay out the flags out in the order that you want them.


3. Use Pre-Cut Letters, or if your like me and your don't own one of those fancy schmancy silouette's, cut them out your self.  I had to redo a couple but all in all it was no biggy.


4. Apply glue to the letters like so, and then add the glitter.  Do this to all the letters so the glue can be drying while you do the next step.

5. Step four:  Cut out enough pieces of burlap, to go under each letter.
*Tip: I did not worry about perfectly cutting my burlap or making sure it was positioned beautifully onto my flag.  I like things perfectly imperfect...(I learned to accept perfectly imperfect from my primary calling)

6. Sew Glittered letter and burlap onto Flag.  I used black thread.   See how I sewed all the way across on this letter?? Don't do that!  Just sew where the black letter is then you do not see the thread.
*Tip...my glitter and glue did get a little messed up when I sewed, on some letters because the glue was not fully dry.  I fixed it easily by dipping it back into the glitter.  You could however save the glitter until after you have sew the letter and burlap onto the banner if you think that works best.  Like I said my opinion is really just my opinion :)


 7. Sew the Top part of the banner onto the flags. (Make sure all the letters are in order as you do this)
Cut a piece of burlap and fold it over and sew with the flags on the inside of the burlap.  For this picture I used the end of the burlap sac that I had that had a cool folded over ending.  The next picture shows the fold and sew technique.


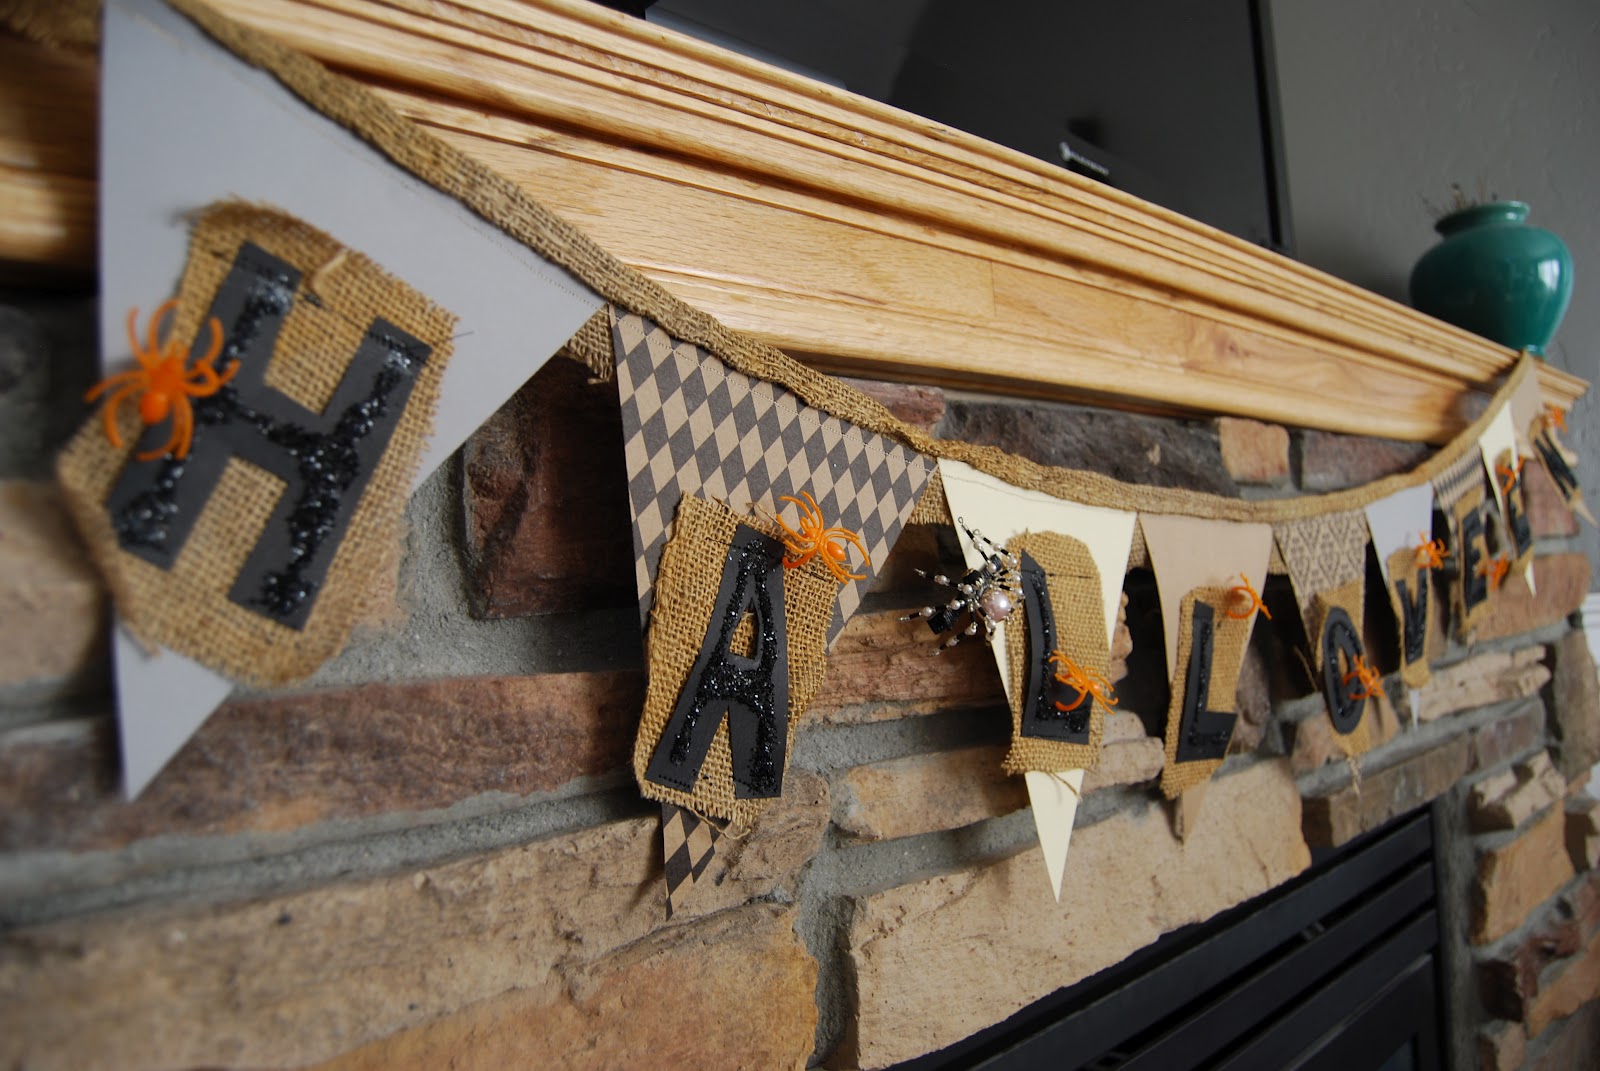
And here is the end result!!  Super easy and fun to make!


I decided to add some of those plastic ring spiders to give it just the right amount of creepy to make it Halloween worthy.


And here is a cute little ghost that my son made for me, last year I think? I just love it.

Happy Crafting all!
Loves,
Jill


Sunday, September 23, 2012

Reds and Yellows

  
We made our way up the canyon today. And the colors are absolutely breath taking.  
Lily has already convinced me to decorate for Halloween, and the boys are talking Christmas already. 
I even did my first bit of Christmas shopping (which is very unlike me). 


It is for sure not their favorite thing to do, take pictures that is,
but if I promise them an awesome hike they usually will give me some perfect shots.
I wasn't kidding about the amazing color huh??
I didn't do any editing to these photos (if you can't tell from the little black image to the right). 
There honestly is no need when the colors and shadows are this perfect out.


If you could of only seen how many cars I had to dodge to get this picture, you would of been impressed!  
The tripod is in the middle of the road right now ;)

I snuck a kiss at the last second, and got a real smile out of Cory.

I have a ton more, that I'd love to share, but I should got to bed.
Tomorrow is Monday and it's coming whether I go to bed on time or not.

Loves,
Jill